By: Melissa L. Partyka-University of California, Davis, Western Center for Food Safety; Ronald F. Bond-University of California, Davis, Western Center for Food Safety; Ines Hanrahan-Washington Tree Fruit Research Commission, Union Gap, WA
This document is meant to provide simple, easy to follow recommendations for water quality sampling under the FSMA Produce Safety Rule for Agricultural Water testing. The methods described here are not meant to be prescriptive, as there are many ways to take a water sample, but represent best practices used by researchers at the Western Center for Food Safety, and FDA Center of Excellence at UC- Davis. Guidance documents from FDA regarding water sampling are expected soon, and this document will be adjusted, should FDA recommendations be different from what has been described herein.
Printable version. Water sampling made simple.
Safety First
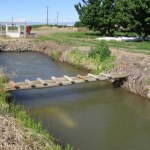
Whether you are sampling open water sources (e.g. rivers, canals and ponds) or piped sources, there are some simple techniques that will keep you safe from dangerous situations and protect the integrity of your samples:
Know your sample site
It’s always best to do some reconnaissance near your water source to determine the easiest access point and potential hazards. It’s a good idea to remove any obstacles that will hamper your ability to get a clean, representative sample. For example, if you’re sampling a canal, high grass, or dense brush should be trimmed or removed at your access point (Figure 1). Avoid areas of the canal that are under maintenance and look for signs of wildlife (i.e. avoid the rattlesnake den!).
For piped water sites, make sure there is an obvious sample point, such as a valve or spigot, and avoid using old garden hoses that can harbor bacteria (Figure 2).
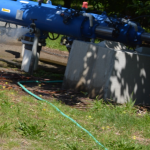
It’s also a good idea to clear vegetation and insect nests away from your sampling point since it’s hard to take a clean sample when standing on an ant mound or shoving aside thistles.
Maintain your sample site
You are likely to be sampling this source of water for years to come, so take the time to keep your site maintained and easy to access. If you’re sampling from an open source, keep an eye out for algae growth (Figure 3) and fouling near your intake.
If you’re sampling from a pipe, make sure to keep your valve/spigot in good working condition and free of rust. Placing signs or marking the area can help ensure that others can find your site easily if you’re not available.
Be prepared
Let someone know when you are heading out to take a sample. If you’re sampling from canals or the river, avoid having to lean in too far by bringing a sampling pole. If you’re sampling from piped water, bring a wrench or other tools along if there’s a chance your valve will stick. Be sure to have something to write on, extra sample bottles (or bags), and a cooler with ice or ice packs (blue ice). Avoiding multiple trips for forgotten equipment will allow you to take your time and take a clean, representative sample.
Where Do I Sample?
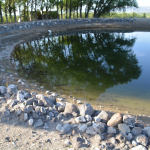
Currently FSMA does not have specific requirements for sampling location, though it is possible that additional guidance will be provided in the coming months. However, the FDA does recommend sample locations be “representative of your use of the water”. This could simply mean at your turnout or at the well, the pump, or any point in the system used to convey irrigation to covered crops. You have the freedom to choose your site, so make a practical choice, but one that is also representative of your source. Sampling at a sprinkler head or drip emitter for these samples is allowable, but not recommended for three reasons: 1) sprinkler heads and drip tape can be moved around and changed out, so they are not a consistent, reliable sampling location, 2) it is very difficult to take an aseptic sample from a sprinkler head during irrigation, and 3) if you do have changes in your water quality profile, it will be more complicated to trace the problem back through your system than if you had taken your samples (Figure 3). Pond or reservoir with algal growth closer to your source. Note: some private audit schemes such as Global GAP may require taking samples at the emitter or sprinkler.
How Do I Take a Sample?
Sampling for FSMA is fairly easy with a little practice. Always label your bottle first. Do not label the cap. Avoid sampling into another container that requires transfer of your sample into the final bottle.
Generally, successful sampling can be accomplished in six steps:
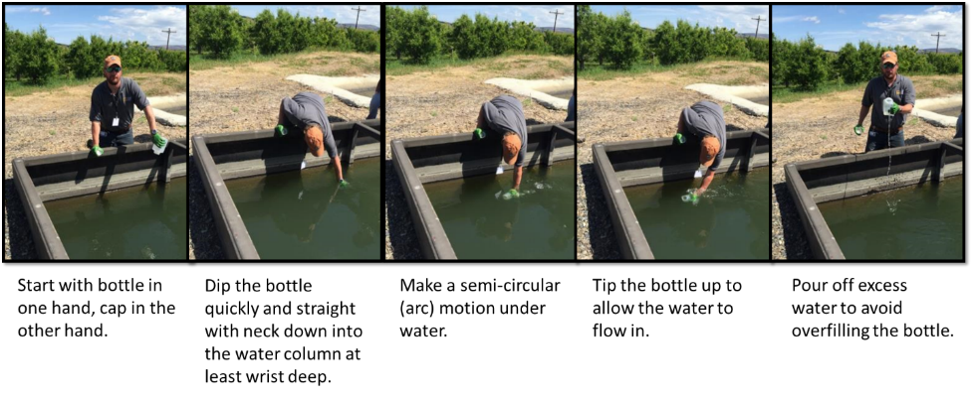
Surface Water (Figure 4)
1. Grasp the bottle near the base with one hand or securely connect it to your sampling pole, while removing the cap with the other hand. Secure the cap and avoid putting your finger on the inside or dropping it face down on the ground.
2. If sampling moving water, face upstream so your hand/arm are downstream of your bottle.
3. Invert and submerge the open bottle quickly downward below the water surface to at least wrist deep. The actual depth is not prescriptive, but you want to avoid skimming the surface.Avoid touching the bottom, disrupting the sediment or sides of the canal, river, or pond which
can harbor high numbers of bacteria.
4. Tip the bottle upward into the flow of the current, allowing air to escape and the bottle to fill.
5. Lift the bottle straight up through the surface. Do not overfill your bottle, ensure enough ‘head space’ or air for the sample to be shaken at the lab (~1 inch). Dump a little out if your bottle is too full.
6. Secure the cap tightly and place the sample in your cooler.
Piped Water
- Before collecting the sample, remove screens, filters, or hoses that could harbor bacteria.
- Turn on the water supply and flush the system for 2-5 minutes (depending on distance from source). This helps to remove built up materials from inside your sampling point and clears standing water from the
line. - Turn off the water and swab the inside and outside rim of the sampling point with ethanol (alcohol prep pads work well). Flush again for an additional 2-5 minutes to rinse off the ethanol.
- While flushing the final time, prepare your sample bottle by holding it tightly in one hand and removing
the cap with the other. Secure the cap, avoiding putting your finger on the inside or dropping it face
down on the ground. - With the water still running, place your sample bottle or bag into the stream of water sample until
nearly filled (Figure 5). Ensure enough head space or air for the sample to be shaken at the lab
(± 1 inch). Most sample containers have a marked fill line. Avoid excessive splashing and be sure
water doesn’t run from your hand into the sample bottle or cap. -
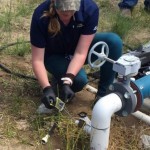
Figure 5. Piped water sampling.Photo credit WTFRC Secure the cap tightly and place the sample in the cooler.
After completion of all six steps, fill out your sampling form. An example is provided here: (ChainofCustody)
Do I have to record all of my samples?
The purpose of water testing under FSMA is for growers to understand the normal variability of their water sources and to plan for it, but there are going to be times when something unexpected happens and your test results are very different than previous samples. Under FSMA, growers are allowed to conduct what is referred to as “corrective measures”. This means that you have the ability to fix a contamination event and retest if you suspect a transient problem. With proper documentation the unexpected result can be excluded. Here are a couple of examples taken directly from the federal register:
Repairable Point Source
Say that following a summer storm, the side of the earthen canal upstream of your sampling point collapsed and spilled a bunch of bacteria-rich sediment into the water. You happened to sample this water without realizing there was a problem. Your results are now highly biased and not representative of the normal conditions of your water source, so now what? ‘The Produce Rule’ says you should stop irrigation and investigate. If you then found out about the canal collapse and saw that your irrigation district was in the process of repairing it, this is what is referred to as both a “rare event” and a “repairable point source” of bacterial contamination. ‘The Produce Rule’ states that “the data set should be made up only of samples that are not reasonably likely to have been affected by the non-recurring point-source contamination (rare event)”. So according to the rule, this data should not be included in the water quality profile. Growers should document this correction in their records and use only pre-collapse and post-fix samples to calculate their GM and STV values.
Contamination Events
We call this the “the dead deer in the canal” scenario. As we know, irrigation sources can be attractive to wildlife and other animals and occasionally one falls in or dies nearby. Perhaps you either noticed an elevation of bacterial counts in your test results and chose to investigate, or happened upon a dead animal in your irrigation source water, now what? Again, according to the rule, farms (upon discovery of a hazard) should discontinue using affected agricultural water, remove the potential contaminant, re-inspect, and clean the water distribution system under the farm’s control before resuming the use and sampling of water. Therefore, if you found the dead deer prior to taking a sample, you need only remove the problem, clean your system, and continue as before. If you only realized there was a dead deer because your test results were high, then as in the previous example, you must document the problem, document the solution, and continue on as before without the “rare event” data.
Necessary Sampling Equipment
Surface Water Sampling
- Clean gloves (powderless latex or nitrile)
- Sterile sampling container (minimum 100 mL)
- Reusable Polypropylene or polypropylene copolymer (autoclavable)
- Sterile single use bottle (plastic or glass)
- Sterile Whirl-Pak® bag (minimum 4 oz.)
- Labels or tape for sample identification
- Sample pole for harder to access open water sources (see examples)
- Pens and permanent marker
- Chain of Custody for field records and sample release (pdf./docx.)
- Sampler’s name
- Date
- Time
- Location
- Signature lines with date and time
- Cooler with ice or frozen packs
Piped Water Sampling
- Same equipment as above with the following additions:
- Sterile alcohol swabs
- Same equipment as above with the following additions:
Extra Equipment/Items
- Surface and Piped Sampling
- Dilute alcohol spray bottle
- GPS unit
- Camera
- Sodium Thiosulfate tablets (10 mg/120ml) for chlorine inactivation
- Wrench for difficult valves
- Brush to clean intakes
- Safety Equipment
- First-aid Kit
- Cell phone or VHF radio
- Proper clothing
Additional Sampling Resources
- Water Sampling made simple ppt.
- USGS National Field Manual for the Collection of Water-Quality Data http://water.usgs.gov/owq/FieldManual/chapter4/pdf/Chap4_v2.pdf
- USEPA-Handbook for Sampling and Sample Preservation of Water and Wastewater http://nepis.epa.gov
Contact Information
Melissa Partyka: mlpartyka@ucdavis.edu
Ronald Bond: rfbond@ucdavis.edu
Ines Hanrahan: hanrahan@treefruitresearch.com
